How to Make Soft Ice in a Water Bottle (Step-by-Step Guide)
To make soft ice in a water bottle, chill purified water just below freezing without disturbing it, then gently agitate it to initiate a slushy, soft ice formation.
Making soft ice, also known as instant ice or supercooled water, is one of the most fascinating and satisfying science-based tricks you can perform at home. With just a water bottle and a freezer, you can create a slushy-like ice consistency that’s perfect for science enthusiasts, kids, and even adults looking for a cool kitchen experiment. In this article, we’ll explore how to make soft ice in a water bottle using safe, simple steps, backed by science. We’ll also cover safety tips, troubleshooting advice, and common questions.
What is Soft Ice?
Soft ice, also known as slush ice or instant ice, is semi-frozen water that has a slushy consistency. It is different from regular ice cubes which are solid and rigid. Soft ice has a smoother texture, often used in slushy drinks, and forms under specific temperature conditions.
Table: Comparison Between Regular Ice and Soft Ice
| Feature | Regular Ice | Soft Ice (Slushy) |
|---|---|---|
| Texture | Hard and solid | Semi-solid, slushy |
| Freezing Point | 0°C (32°F) | Just below 0°C |
| Uses | Cooling drinks | Making slush drinks |
| Appearance | Clear or cloudy | Crystalline slush |
🧊 Science Behind Supercooling and Soft Ice
Supercooling happens when water is cooled below 0°C (32°F) without it freezing. This can only occur if the water is extremely pure and undisturbed. The absence of impurities and vibrations allows water molecules to remain in a liquid state even when they should freeze. When the supercooled water is shaken or disturbed, it instantly turns into ice.
🔍 Essential Materials Needed
To begin, gather the following materials:
| Item | Description |
|---|---|
| Purified Water Bottle | Distilled or purified bottled water works best. |
| Freezer | Must be capable of reaching 0°C (32°F) or below. |
| Timer or Watch | To monitor the cooling time. |
| Towel or Gloves | To safely handle the cold bottle. |
⚠️ Important Safety Tips
Before starting, consider these safety measures:
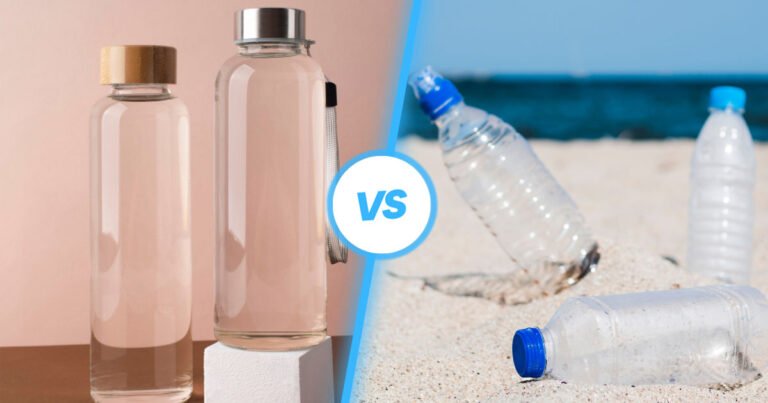
Never use glass bottles; they can shatter if the water freezes too quickly.
Use only clean, sealed plastic bottles.
Do not overfreeze; monitor time closely.
Wear gloves or wrap the bottle in a towel to avoid frostbite or cold burns.
📝 Step-by-Step Guide to Make Soft Ice in a Water Bottle
Let’s break the process down into simple, detailed steps:
Step 1: Use the Right Water
Start with purified or distilled water because it lacks impurities that cause premature freezing. Tap water may not work due to its mineral content.
Step 2: Chill the Water Bottle
Place the sealed water bottle gently in the freezer. Lay it on its side to create an even surface for ice formation later. Set a timer for 2 to 2.5 hours.
⚠️ Do not disturb the bottle during freezing. Movement can trigger early freezing and ruin the experiment.
Step 3: Check for Supercooling
After 2 hours, remove the bottle carefully without shaking it. Test the water by slightly squeezing the bottle or opening the cap. If you see no ice, you’ve successfully supercooled it.
Step 4: Trigger the Soft Ice
Tap or shake the bottle gently, pour it over ice cubes, or open and reseal the cap to initiate the freezing process. Watch as the water turns into a soft, slushy texture right before your eyes!
🧊 Soft Ice in a Water Bottle – A Summary Table
| Step | Action | Key Tip |
|---|---|---|
| Step 1 | Use purified or distilled water | Avoid tap water for better results |
| Step 2 | Place bottle in freezer for 2–2.5 hours | Do not move the bottle |
| Step 3 | Carefully remove the bottle | Test by opening cap or squeezing slightly |
| Step 4 | Tap or pour over ice to trigger freezing | Enjoy the slushy transformation |
💡 Why Tap Water Doesn’t Work Well
Tap water contains minerals, impurities, and air bubbles that act as nucleation points for ice to form prematurely. These impurities disrupt the supercooling process. Therefore, purified or distilled water is necessary to delay freezing and allow you to control when ice forms.
🌡️ Ideal Freezing Temperature and Time
The typical freezing point of water is 0°C or 32°F, but for supercooling to work:
Set your freezer to about -5°C to -8°C (23°F to 17.6°F).
Freeze for no more than 2.5 hours.
Test one bottle before placing multiple bottles in the freezer.
A digital freezer thermometer is highly recommended for accuracy.
💬 Common Mistakes to Avoid
Using impure water – Stick with distilled or filtered bottled water.
Overfreezing – Don’t leave the bottle in the freezer overnight.
Disturbing the bottle – Keep the freezer closed and don’t move the bottle.
Using glass containers – Only use plastic to avoid breakage.
🧪 Variations and Fun Experiments
Want to try something new? Here are some exciting variations:
1. Pouring Over Ice Cubes
Pour your supercooled water over a bowl of ice cubes and watch it freeze instantly in waves. This creates a visually stunning “ice tower” effect.
2. Add Food Coloring
Before placing the water bottle in the freezer, add a drop of food coloring. The ice will freeze in colorful layers, which looks great for kids’ science activities.
3. Create Ice Sculptures
After triggering the ice, shape it using plastic molds to create icy designs for drinks or displays.
🧃 Can You Drink Supercooled Water?
Yes, supercooled water is safe to drink if you use clean, sealed water bottles. However, once it freezes into soft ice, the slushy consistency may be harder to sip. You can mix it with fruit juice or flavorings to create a homemade slushy.
📌 Why This Process Works Only Sometimes
Supercooling is a delicate process. Even slight movement, impurities, or incorrect timing can cause early freezing. If it doesn’t work the first time, adjust:
The type of water
Freezer temperature
Freezing duration
Persistence is key to mastering soft ice creation.
🌍 Real-Life Applications of Supercooled Water
Soft ice isn’t just for fun. It’s used in:
Medical cooling technologies
Cryopreservation research
Food industry slush production
Understanding how water behaves below freezing without solidifying helps engineers and scientists in multiple fields.
❓ Frequently Asked Questions (FAQs)
Q1: Can I use tap water for soft ice?
A: Tap water contains impurities that cause premature freezing. Use purified or distilled water for best results.
Q2: How long should I leave the bottle in the freezer?
A: Typically between 2 and 2.5 hours. Always test with one bottle first.
Q3: What happens if I leave it too long?
A: The water may freeze solid, turning into regular ice instead of staying supercooled.
Q4: Is it safe to drink soft ice?
A: Yes, as long as the water used is clean and the bottle remains sealed during freezing.
Q5: Why doesn’t the experiment work every time?
A: Slight disturbances, temperature variations, or impure water can cause failure.
Q6: Can I refreeze the bottle if it doesn’t work?
A: Yes, but let it return to room temperature first before trying again.
Q7: What kind of bottles should I use?
A: Only use clean, sealed plastic bottles. Avoid glass for safety.
Q8: Can kids try this experiment?
A: Yes, with adult supervision due to freezer safety and cold exposure.
Q9: Can I add flavor before freezing?
A: Yes, but only if the added ingredients don’t cause premature freezing.
Q10: Will a regular refrigerator freezer work?
A: Yes, as long as it reaches below 0°C (32°F) and stays stable.
🏁 Conclusion / Final Words
Making soft ice in a water bottle is an exciting and educational activity that merges science with everyday life. Whether you’re experimenting for fun, conducting a classroom demo, or just impressing friends, soft ice is easy to make with a bit of patience and care. Remember to use purified water, monitor your freezing time, and handle everything gently.
As you explore the wonders of supercooling, you’ll gain a deeper appreciation for the hidden behaviors of water and temperature. Try it today, and experience the magic of ice forming in your hands!

